Connecting Google Calendar
Your agent reads the calendar you choose, offers slots that are free on it, and writes the appointment back during the call. It can also reschedule.
Before you start
Section titled “Before you start”- A Google account with access to the calendar appointments should land on.
- Callspace books through one provider at a time. Disconnect Jobber, Calendly, or Juvonno first, or the connection is refused with Another booking provider is active.
Connect it
Section titled “Connect it”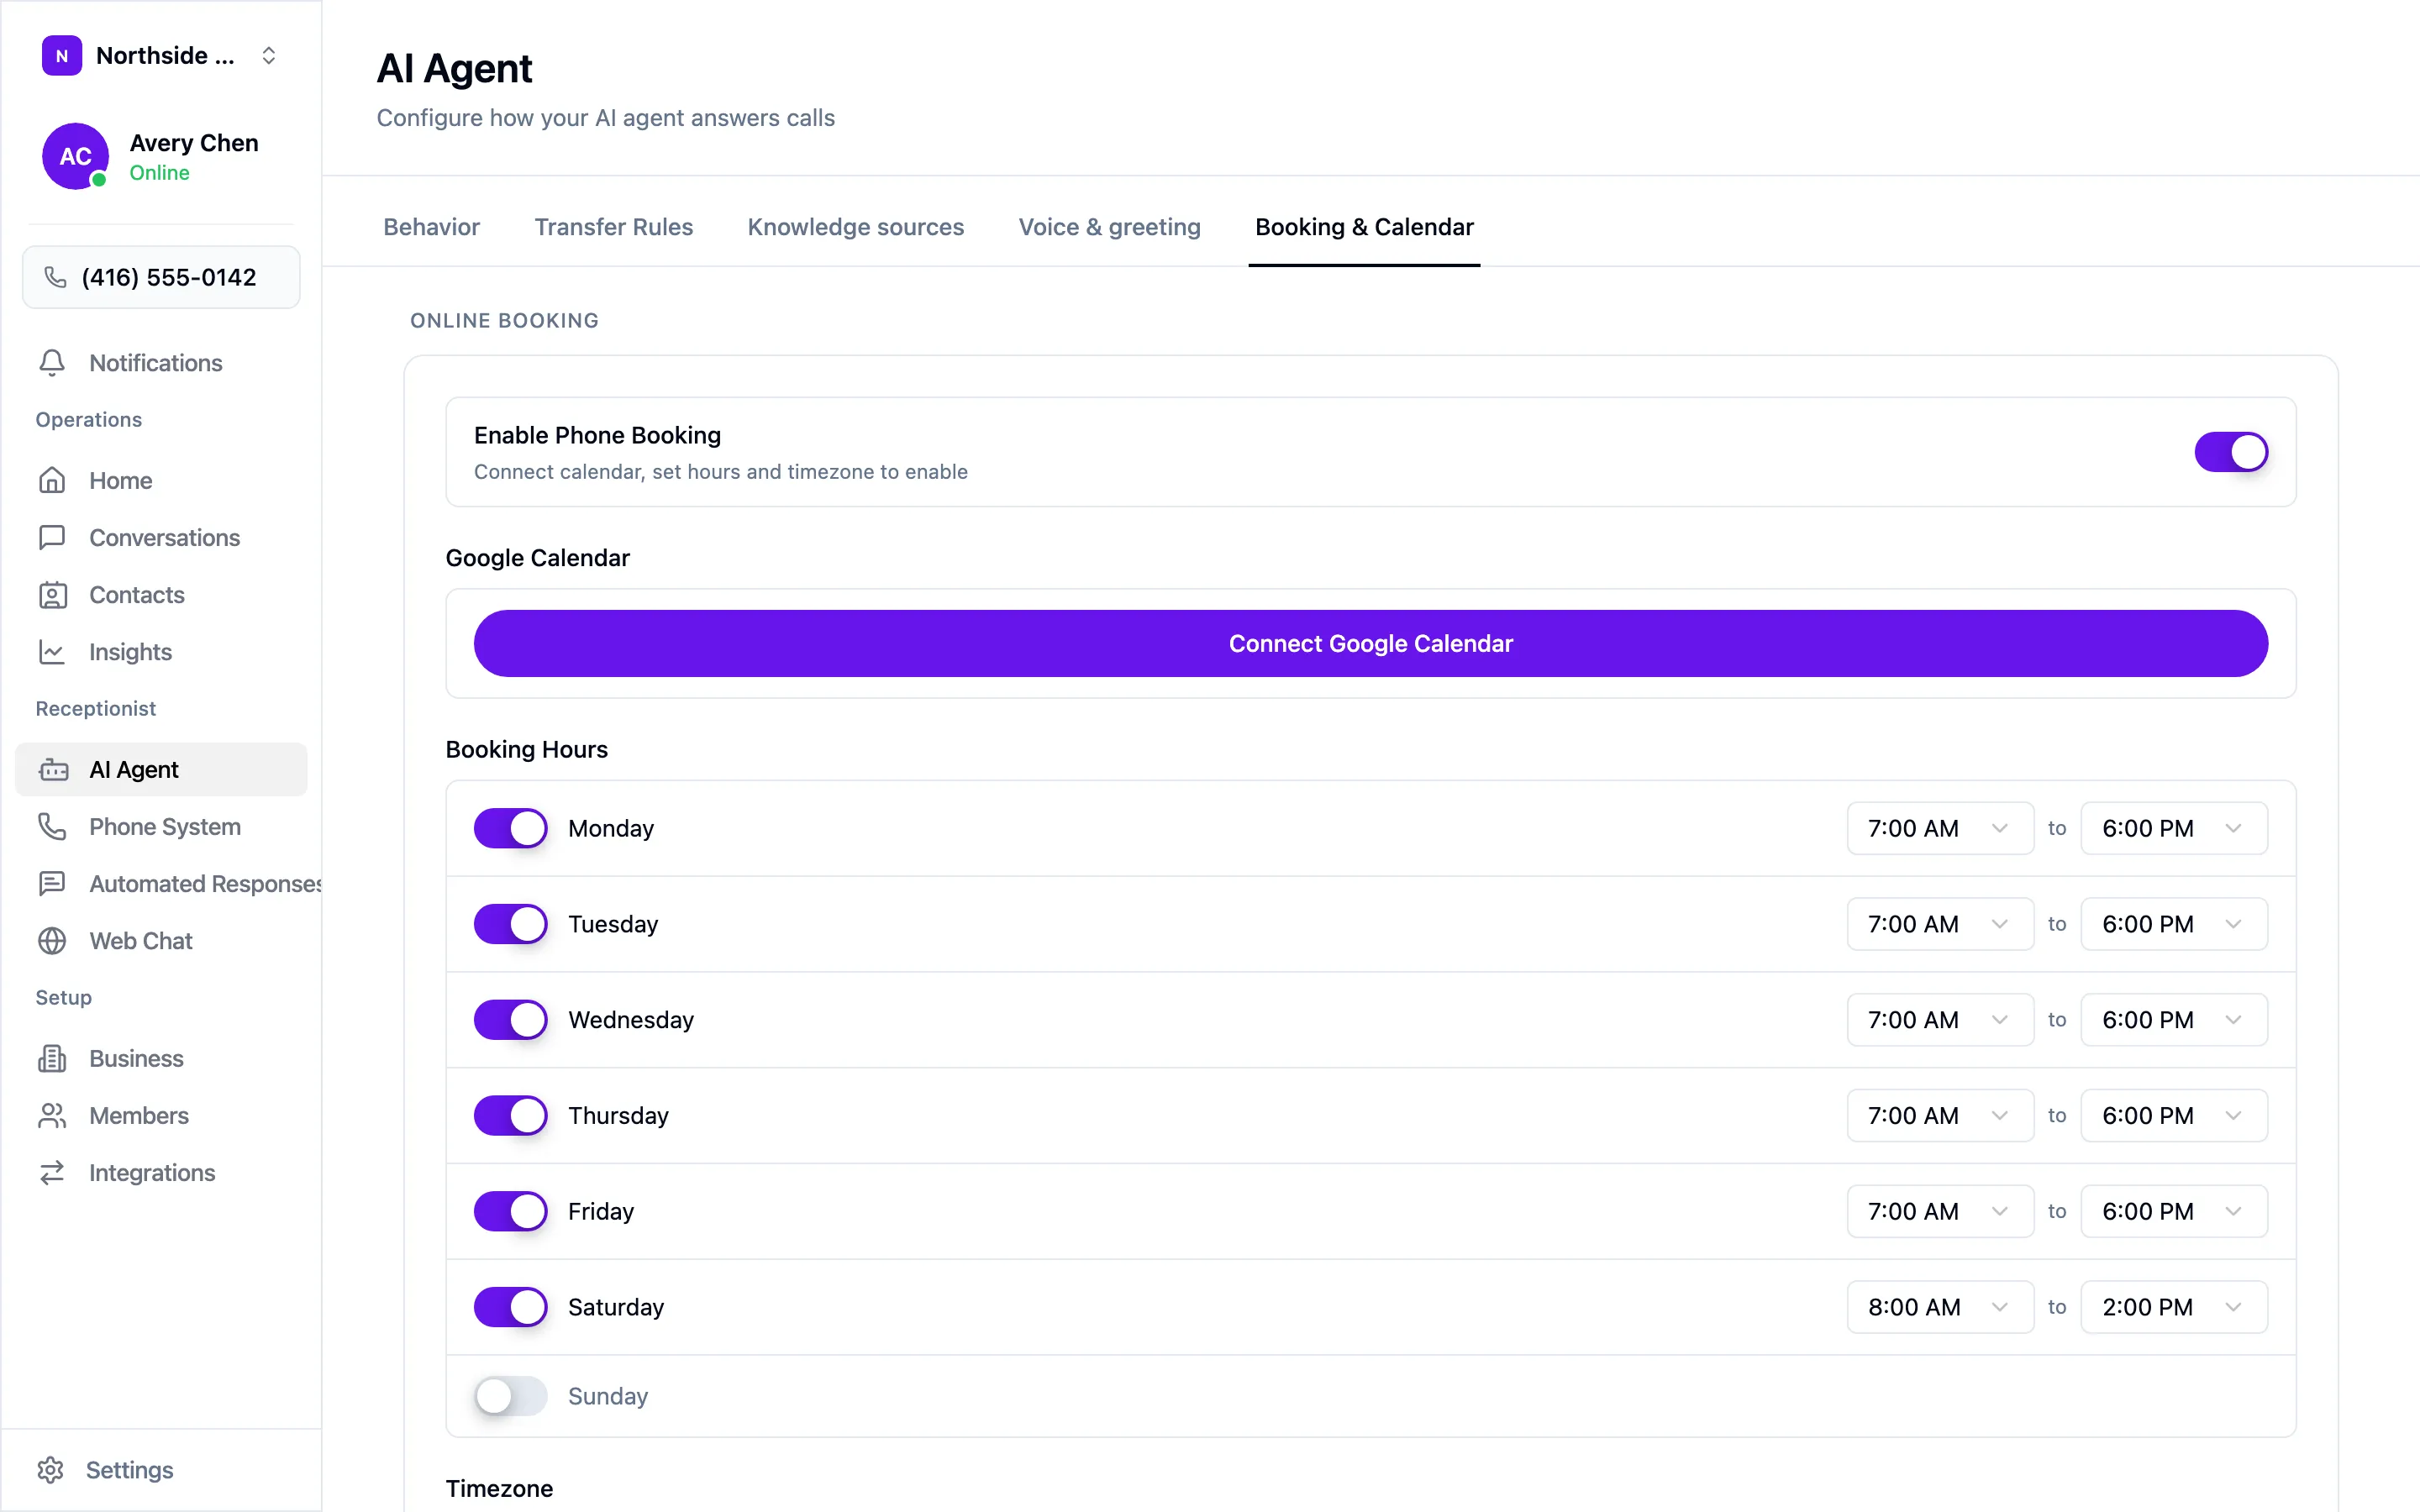
- Open AI Agent → Booking & Calendar and choose Connect Google Calendar.
- Sign in to Google and allow calendar access. Granting the calendar permission is what makes booking available.
The Google Calendar tile under Settings → Integrations opens this same screen.
Set it up
Section titled “Set it up”- Calendar — defaults to your primary calendar. Switch it if appointments belong on a shared or job-specific one.
- Booking hours — toggle each day on or off and give it a start and end time. These are the hours your agent may offer, which can be narrower than your opening hours.
- Timezone — every slot your agent offers is calculated from this.
- Appointment settings:
- Appointment duration — how long each booking blocks off.
- Lead time — minimum notice before the earliest slot offered.
- Booking window — how far ahead it will book.
- Buffer between appointments — travel or reset time between jobs.
- Enable Phone Booking — available once the calendar, hours, and timezone are set. Turn it on last.
Test it
Section titled “Test it”Call your own number and book an appointment as a customer would. Check that the slots offered fall inside your booking hours, that the appointment lands on the right calendar, and that the time is the one you expect. Repeat this after any change to your hours.
Disconnecting
Section titled “Disconnecting”Choose Disconnect next to the connected account. Your agent stops offering slots. Appointments already on your calendar stay where they are.
More on the settings around booking: Letting callers book appointments.